
The best internal newsletters are those that inform, engage and inspire employees, and Slack can be the perfect channel for your newsletters if done effectively. In this article, we provide a step-by-step guide on how to create a compelling Slack newsletter using Canopact.
It’s first worth mentioning that you’ll need to download the Canopact app in your Slack workspace if you haven’t already. It takes less than 5 minutes to do this, and you can start a 30-day free trial without a requirement for payment details. Here’s how to get started with Canopact.
Once you’ve opened Canopact from your Slack workspace, you can follow these steps for your newsletter:
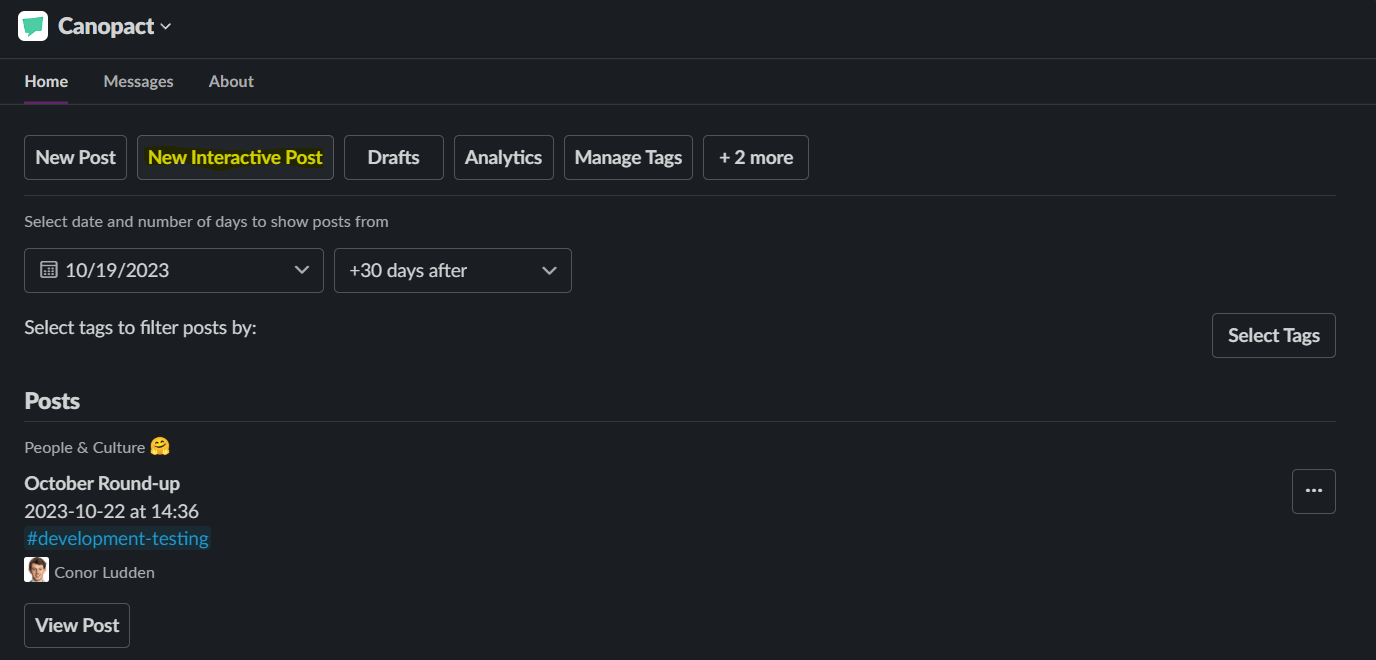
1. Select New Interactive Post in the Home tab of the Canopact app. Now you’re in the Interactive Post Builder 🧱
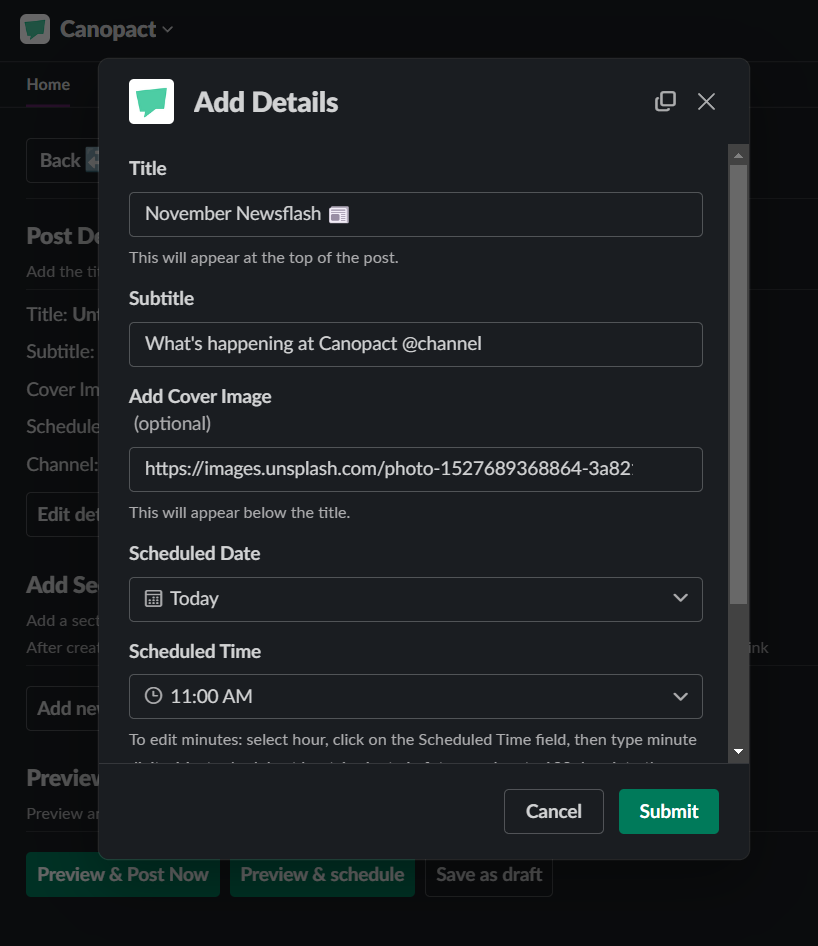
2. Click on Edit Details to open a window where you can input the key details for your newsletter (title, sub-title, date/ time, Slack channel). Keeping your titles short and to the point tends to work best, but add some emojis/ rich text also! We like using Emojipedia for our emojis ✨
With Canopact, you can add a large cover image which sits under your title and above the sections of the newsletter to grab people’s attention. This image needs to be pasted as a URL (starting with https://), and it could come from your company Google Drive, Google Images or a platform for images like Unsplash (simply right click and Copy image address).
It’s also important to consider which Slack channel is the best one for your newsletters. Some channels can get very noisy, and your newsletter may become lost, so you might want to have a dedicated channel for company official comms/ announcements (you can also manage channel posting permissions on Slack).
3. Select Add new section to get started on the first section of your newsletter. Here, you’ll input the text and visuals (images/ GIFs) which will be viewed by employees before they click anywhere on the post. The preview text should be a concise summary of the section and employees should be able to determine how relevant the section is to them by reading this.
You can also include the names of any authors/ contributors for this section of the newsletter, along with tags that you want to assign to the section. With Canopact, tags can be topics like Employee Wellness, departments like Engineering or anything else you want them to be! You can create and edit tags, by selecting Manage Tags in the Canopact App home, and you can also decide whether you’d like the tags to be visible to employees at the top of the section or just for Canopact users to track.

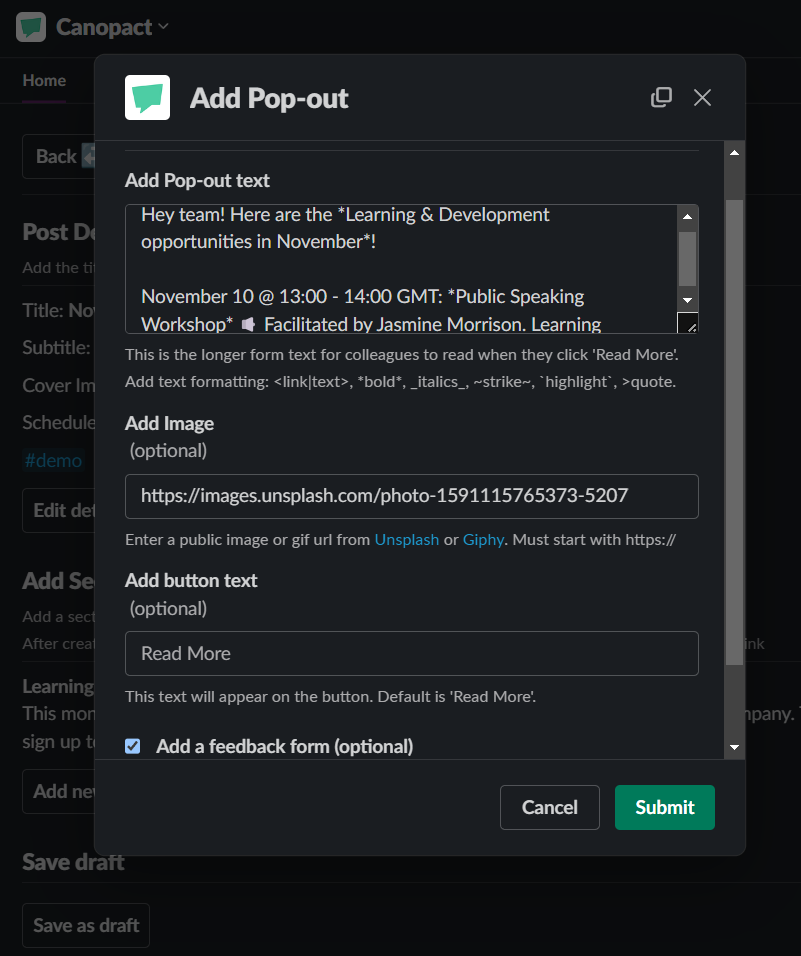
4. Once you’ve added a section, now you can decide on the call to action (e.g. Read More) and what the clickable button for that section directs your colleagues to. You have two options with Canopact: a link or a pop-out. To do this, click More Actions to the right of a section in your interactive post builder, and select an option from the dropdown list. A link is fairly intuitive, and can be any internal company or external URL, such as a wiki page, jobs board or external article.
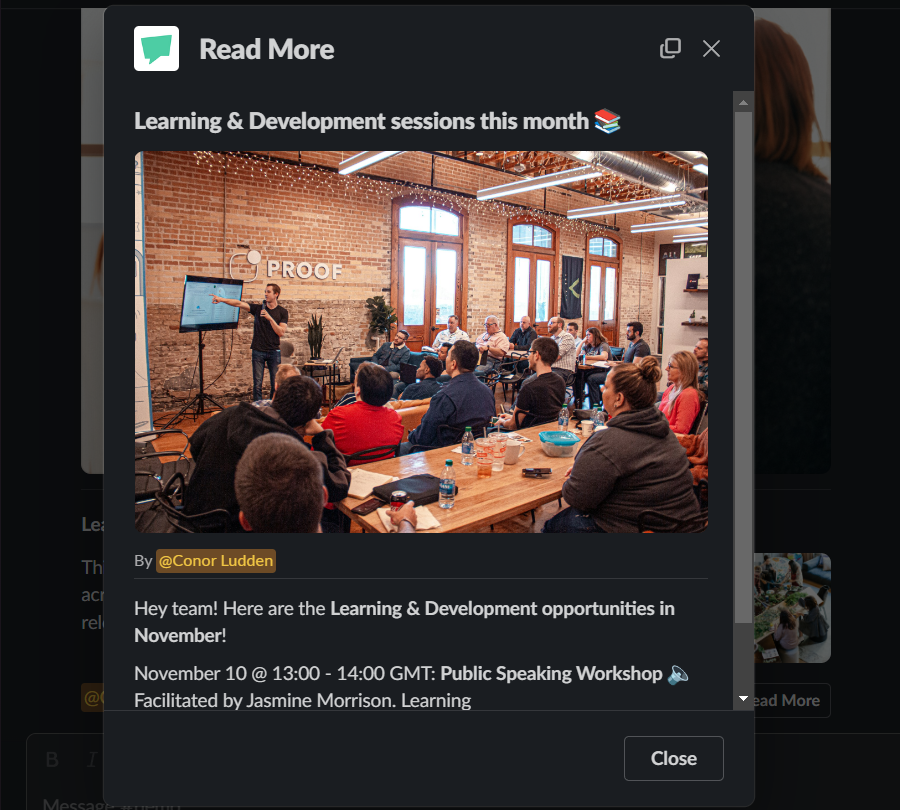
With Canopact, you can also embed longer form content in your newsletters using pop-outs: this is when a new window appears in Slack, and employees can scroll through the content as they would with an article. Some of the benefits of pop-outs include keeping your employees within the Slack interface (where they’re already engaged and have a better chance of reading other sections of your newsletter) and more meaningful engagement analytics to understand how long on average employees spend reading the content, in addition to the click-through rate.
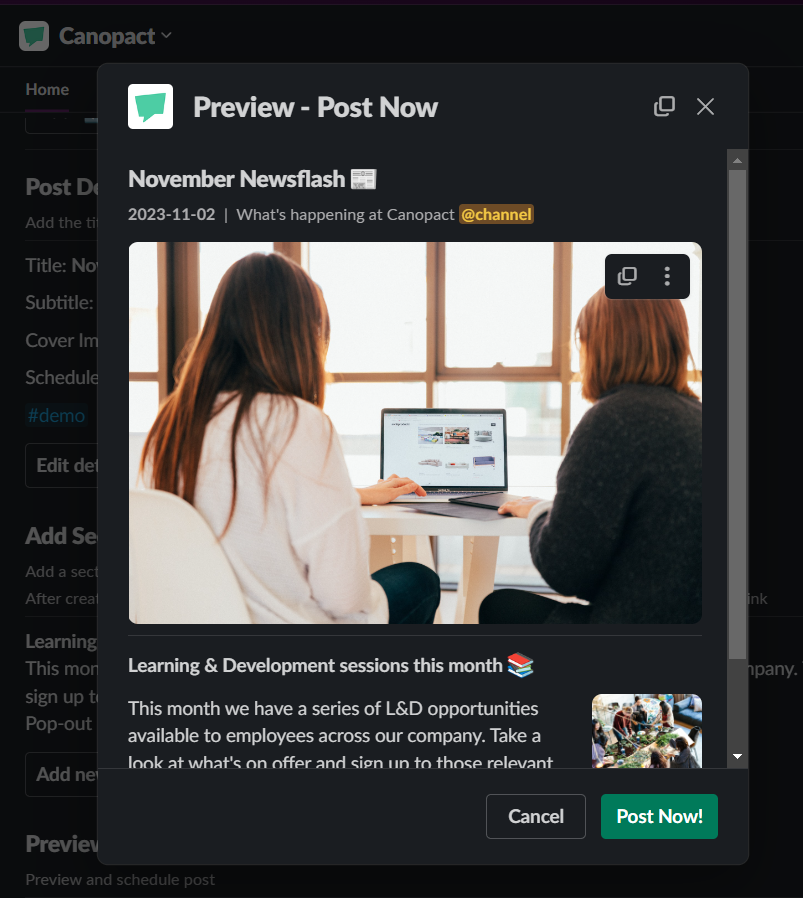
5. Keep adding more sections to your newsletter, or if you want to come back to edit your newsletter later, select Save as draft underneath the sections. We recommend 3 - 6 sections per newsletter as an ideal range, but there aren’t any minimum or maximum requirements. When you’re ready to post your newsletter to the channel, you can preview the post beforehand to check that the images/ GIFs, pop-outs and links are all working as expected. You can send the newsletter post either from the interactive post builder or from the Drafts tab (if it’s saved as a draft). For the latter, all you need to do is to select the ellipsis (...) dropdown to the right of the draft post, and choose Post Now from the dropdown.

6. Congratulations! 🎉 Your newsletter has now been posted to one of your Slack channels. Your colleagues will probably notice how visually distinctive and engaging Canopact Interactive Posts are compared to general Slack posts, and you’ll be able to compile all your important company updates in one place, without having to worry about long blocks of text in the channel itself (or requiring colleagues to go to a separate wiki page/ intranet for the announcements). Next time, we’ll be giving you a step-by-step guide on how to use Canopact Analytics for your Slack newsletters (and other interactive posts), so stay tuned for this!


.jpg)
.remini-enhanced.jpg)
.png)
.png)